Why You’ll Love This Recipe
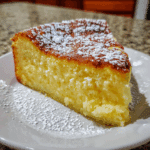
Vanilla Magic Custard Cake is a beautifully simple dessert that transforms one batter into three distinct layers as it bakes: a soft and tender base, a silky custard center, and a delicate sponge top. It’s light, elegant, and surprisingly easy to make—perfect for both everyday treats and special occasions. What I love most about this recipe is how magical the transformation feels; the thin, pourable batter settles into layers effortlessly, requiring no complicated technique. I once added a touch of almond extract along with the vanilla, and it worked great, giving the cake a subtle nutty aroma. Whether dusted with powdered sugar or served with fresh fruit, this Vanilla Magic Custard Cake offers a delicate, creamy bite that melts on the tongue.
Vanilla Magic Custard Cake: A Light, Dreamy Dessert with Three Perfect Layers
- Total Time: 2 hrs 10 mins
- Yield: 9 squares
- Diet: Vegetarian
Description
A light and dreamy vanilla custard cake that magically forms three distinct layers—fluffy sponge on top, silky custard in the middle, and a soft, dense base—using one simple batter.
Ingredients
- 4 large eggs, room temperature, separated
- 3/4 cup granulated sugar
- 1 tbsp water
- 1/2 cup unsalted butter, melted and cooled
- 1 tbsp vanilla extract
- 3/4 cup all-purpose flour
- 2 cups lukewarm milk
- 1/4 tsp cream of tartar (optional, for beating egg whites)
- Powdered sugar for dusting
Instructions
- Preheat oven to 325°F (165°C). Grease and line an 8×8-inch baking pan with parchment paper.
- Separate the eggs. Beat egg yolks and sugar until pale and fluffy, then mix in water, melted butter, and vanilla.
- Add flour and mix until smooth.
- Slowly pour in lukewarm milk, whisking until fully incorporated. Batter will be very thin.
- In a clean bowl, beat egg whites (and cream of tartar if using) to stiff peaks.
- Gently fold egg whites into the batter in 3 additions. Do not overmix—some lumps are okay.
- Pour batter into the prepared pan and bake for 45–55 minutes, or until the top is golden and center is set.
- Cool completely, then refrigerate for at least 2 hours before slicing.
- Dust with powdered sugar before serving.
Notes
- Lukewarm milk helps create the cake’s signature layers.
- Do not overfold the egg whites—airiness is key for the magic separation.
- Allow the cake to rest fully before cutting for clean layers.
- Try almond or lemon extract for subtle flavor variations.
- Prep Time: 15 mins
- Cook Time: 55 mins
- Category: Dessert
- Method: Baking
- Cuisine: European
Ingredients
(Tip: You can find the complete list of ingredients and their measurements in the recipe card below.)
Eggs
Separated into yolks and whites; the whipped whites help form the airy top layer, while the yolks enrich the custard.
Sugar
Sweetens the cake and helps create structure in the sponge-like top layer.
Butter
Adds richness and moisture, contributing to the custard’s silky texture.
All-Purpose Flour
Provides subtle structure without weighing down the delicate batter.
Milk
Warm milk creates a smooth, pourable batter that separates into layers during baking.
Vanilla Extract
Infuses the cake with sweet, aromatic flavor that defines this classic dessert.
Salt
Balances sweetness and enhances the vanilla notes.
Directions
Begin by preheating your oven to 325°F. Grease an 8×8-inch baking pan and line it with parchment paper for easier removal.
Separate the eggs, placing the yolks in one bowl and the whites in another. Beat the egg whites until stiff peaks form and set aside.
In the bowl with the yolks, whisk in sugar until pale and creamy. Add melted butter and vanilla extract. Mix in the flour until just combined.
Warm the milk gently, then gradually pour it into the batter while whisking. The mixture will be thin and runny—this is essential for creating the magic layers.
Gently fold in the whipped egg whites, leaving some small lumps. Do not overmix.
Pour the batter into the prepared pan and bake for 45–55 minutes, or until the top is golden and lightly set. The center will still have a slight jiggle. Allow to cool completely before slicing to reveal the three layers.
Essential Equipment
Must-Have Tools to Get Rolling
Here’s what you’ll want to have on hand:
Silicone Spatula – Durable, heat-resistant silicone spatula perfect for mixing, scraping, and spreading. Gentle on non-stick cookware and easy to clean.
Large pot – You’ll need this to boil the whole cabbage head and soften the leaves.
large bowl –Spacious, durable large bowl ideal for mixing, serving, or food preparation. Made from sturdy material and easy to clean.
Sharp knife – For coring the cabbage and slicing out the thick stem in each leaf. A paring knife works best.
Mixing bowl – A big bowl makes it easier to combine your meat and rice filling evenly.
Cutting board – For prepping cabbage leaves and rolling them like a pro.
9×13-inch baking dish – Ideal size to fit your rolled cabbage leaves snugly and prevent them from unraveling.
knife – A sharp, durable kitchen knife perfect for slicing, chopping, and dicing with ease.
Servings and timing
Serves 9–12
Prep time: 15 minutes
Cook time: 50 minutes
Cooling time: 2 hours
Total time: 3 hours 5 minutes
Storage/reheating
Store the cake covered in the refrigerator for up to 3 days. Serve chilled or at room temperature. Freezing is not recommended due to the delicate custard center, which can separate upon thawing.
Variations and Customizations
Lemon Magic Custard Cake
Add lemon zest and a splash of lemon juice for a citrusy twist.
Almond Vanilla Cake
Swap part of the vanilla with almond extract for a nutty aroma.
Chocolate Magic Custard Cake
Replace some flour with cocoa powder for a decadent chocolate version.
Coffee Custard Cake
Stir instant espresso into the warm milk for a subtle coffee flavor.
Coconut Layer Cake
Use coconut milk in place of regular milk for a tropical twist.
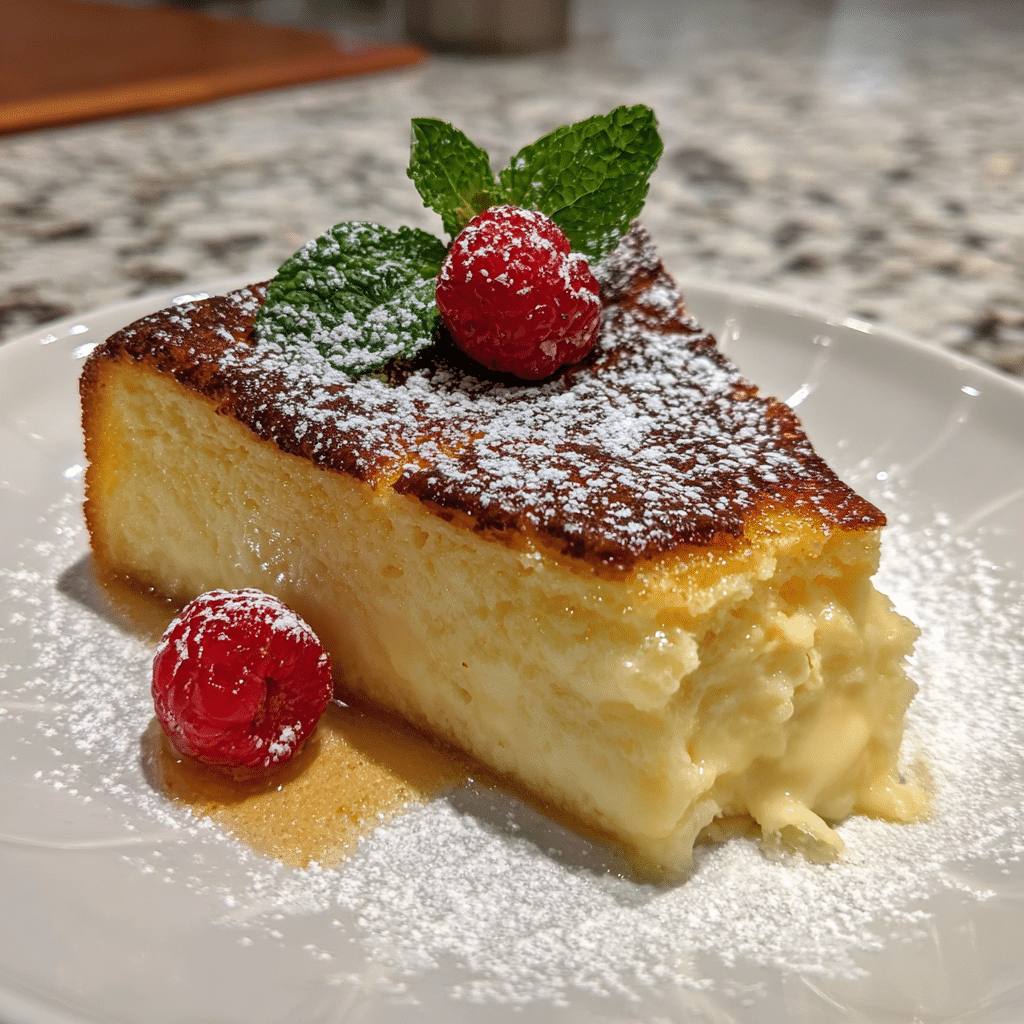
Berry-Topped Magic Cake
Serve with macerated berries or a fruit compote.
Maple Vanilla Cake
Add a spoonful of maple syrup for warm, caramel-like sweetness.
Gluten-Free Version
Use a 1:1 gluten-free flour blend.
Spice-Infused Cake
Add cinnamon or nutmeg for gentle warmth.
Caramel Drizzle
Top slices with homemade caramel sauce for added indulgence.
FAQs
Why does the cake form layers?
The thin batter separates during baking, creating a dense base, creamy center, and airy top.
Can I use skim milk?
Yes, but whole milk produces the creamiest custard.
Do I need a water bath?
No, the recipe bakes beautifully without one.
Can I reduce the sugar?
A small reduction is fine, but too little sugar affects structure.
Why is my cake too firm?
It may have overbaked. The center should still jiggle slightly.
Why didn’t it separate into layers?
Overmixing the egg whites can prevent the layers from forming.
Does it need to be refrigerated?
Yes, due to the custard center.
Can I double the recipe?
Yes, bake in a 9×13-inch pan and adjust time slightly.
What toppings work best?
Powdered sugar, berries, whipped cream, or caramel.
Can I serve it warm?
Cool fully first to allow the layers to set, then let it come to room temperature if desired.
Conclusion
Vanilla Magic Custard Cake is an enchanting dessert that delivers three delightful textures in every slice. Its light sponge top, creamy middle, and tender base create a beautifully balanced treat that feels elegant yet approachable. Perfect for gatherings or quiet evenings at home, this cake invites you to slow down and savor its delicate sweetness. Enjoy crafting—and indulging in—this magical vanilla delight.
Looking for more tasty recipes? Visit our website for full details and follow us on Pinterest for daily food ideas to save and share