Why You’ll Love This Recipe
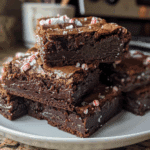
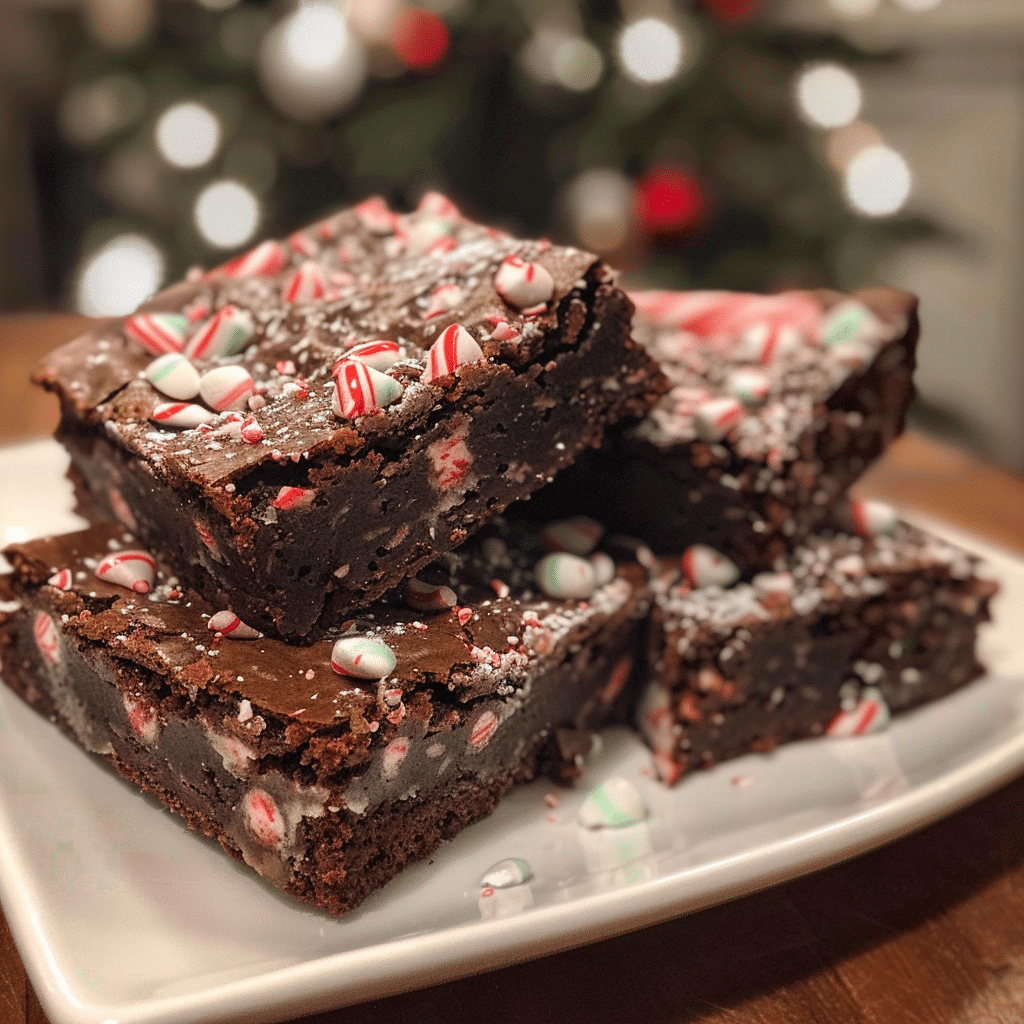
One bowl peppermint brownies are the ultimate holiday dessert — rich, fudgy chocolate with a refreshing peppermint twist. Made in a single bowl, they’re quick, simple, and incredibly satisfying. Each bite delivers deep cocoa flavor balanced by cool, crushed peppermint, creating a treat that’s both decadent and refreshing. I made these last Christmas for a cookie exchange, and they disappeared within minutes — no one believed they were homemade and so easy to make! Whether you’re baking for a festive gathering or just craving something cozy and chocolatey, these brownies are the perfect blend of holiday cheer and classic indulgence.
One Bowl Peppermint Brownies: Fudgy, Festive, and Perfectly Minty
- Total Time: 35 mins
- Yield: 9 brownies
- Diet: Vegetarian
Description
These One Bowl Peppermint Brownies are rich, fudgy, and perfectly festive! Made in a single bowl for easy cleanup, they combine deep chocolate flavor with refreshing peppermint and a touch of crunch from crushed candy canes — ideal for the holiday season.
Ingredients
- 1/2 cup (1 stick) unsalted butter, melted
- 1 cup granulated sugar
- 2 large eggs
- 1 tsp vanilla extract
- 1/2 tsp peppermint extract
- 1/3 cup unsweetened cocoa powder
- 1/2 cup all-purpose flour
- 1/4 tsp salt
- 1/4 tsp baking powder
- 1/2 cup chocolate chips (optional)
- 1/4 cup crushed candy canes or peppermint candies
Instructions
- Preheat oven to 350°F (175°C). Line an 8×8-inch baking pan with parchment paper and lightly grease it.
- In a large microwave-safe bowl, melt the butter. Whisk in sugar, eggs, vanilla, and peppermint extract until smooth and glossy.
- Add cocoa powder, flour, salt, and baking powder. Stir until just combined — do not overmix.
- Fold in chocolate chips if using.
- Pour the batter into the prepared pan and smooth the top with a spatula.
- Bake for 20–25 minutes, or until a toothpick inserted in the center comes out with a few moist crumbs.
- Sprinkle crushed candy canes on top immediately after baking, pressing them lightly into the warm brownies.
- Cool completely before slicing into squares.
Notes
- For extra indulgence, drizzle melted white chocolate over the cooled brownies.
- Adjust the peppermint extract to taste — a little goes a long way!
- Store in an airtight container at room temperature for up to 4 days or freeze for up to 2 months.
- Prep Time: 10 mins
- Cook Time: 25 mins
- Category: Dessert
- Method: Bake
- Cuisine: American
Ingredients
(Tip: You can find the complete list of ingredients and their measurements in the recipe card below.)
Butter — Adds richness and helps create that signature fudgy brownie texture.
Granulated sugar — Sweetens and balances the dark cocoa flavor.
Brown sugar — Adds moisture and a hint of caramel depth.
Eggs — Bind the batter and give the brownies a chewy texture.
Vanilla extract — Enhances the chocolate and complements the peppermint flavor.
Peppermint extract — The key to that cool, minty twist — use sparingly for balance.
Unsweetened cocoa powder — Provides intense chocolate flavor.
All-purpose flour — The structure of the brownie; a small amount keeps them fudgy.
Salt — Balances the sweetness and enhances the chocolate flavor.
Chocolate chips — Melt into the batter for gooey chocolate pockets.
Crushed candy canes or peppermint candies — Add crunch and festive flair on top.
Directions
Preheat oven to 350°F (175°C). Line an 8×8-inch baking pan with parchment paper and lightly grease it.
In a microwave-safe bowl, melt the butter in 20-second intervals until fully melted. Whisk in granulated sugar and brown sugar until smooth and glossy. Add the eggs, one at a time, whisking well after each addition. Stir in vanilla and peppermint extracts.
Sift in cocoa powder, flour, and salt. Mix gently until just combined — do not overmix. Fold in half of the chocolate chips. Pour the batter into the prepared pan and spread evenly. Sprinkle the remaining chocolate chips and crushed peppermint candies on top.
Bake for 25–30 minutes, or until the edges are set and the center looks slightly underbaked (they will firm up as they cool). Cool completely in the pan before slicing. For a cleaner cut, chill the brownies in the refrigerator for 30 minutes before serving.
Essential Equipment
Must-Have Tools to Get Rolling
Here’s what you’ll want to have on hand:
- Large pot – You’ll need this to boil the whole cabbage head and soften the leaves.
- large bowl –Spacious, durable large bowl ideal for mixing, serving, or food preparation. Made from sturdy material and easy to clean.
- Sharp knife – For coring the cabbage and slicing out the thick stem in each leaf. A paring knife works best.
- Mixing bowl – A big bowl makes it easier to combine your meat and rice filling evenly.
- Cutting board – For prepping cabbage leaves and rolling them like a pro.
- 9×13-inch baking dish – Ideal size to fit your rolled cabbage leaves snugly and prevent them from unraveling.
- knife – A sharp, durable kitchen knife perfect for slicing, chopping, and dicing with ease.
- Silicone Spatula – Durable, heat-resistant silicone spatula perfect for mixing, scraping, and spreading. Gentle on non-stick cookware and easy to clean.
Servings and timing
This recipe makes about 9–12 brownies. Preparation takes 10 minutes, baking 25 minutes, and cooling 30 minutes. Total time: approximately 1 hour.
Storage/reheating
Store brownies in an airtight container at room temperature for up to 4 days or in the refrigerator for up to a week. For longer storage, freeze for up to 2 months — thaw at room temperature before serving. To enjoy warm, reheat a brownie in the microwave for 10–15 seconds for that gooey, fresh-from-the-oven texture.
Variations and Customizations
Double Chocolate Peppermint — Add white chocolate chips for a contrast in flavor and color.
Peppermint Mocha — Mix 1 teaspoon of espresso powder into the batter for a café-inspired twist.
Frosted Brownies — Spread a thin layer of peppermint buttercream or chocolate ganache on top.
Gluten-Free — Substitute all-purpose flour with a 1:1 gluten-free flour blend.
Mint Chocolate Chip — Add mint chocolate chips instead of regular chocolate chips.
Candy Cane Crunch — Mix crushed peppermint directly into the batter for extra texture.
Vegan Option — Use plant-based butter, flax eggs, and dairy-free chocolate chips.
Dark Chocolate Lovers — Use Dutch-processed cocoa for a deeper, more intense flavor.
Holiday Swirl — Swirl in a bit of red and white melted chocolate for a festive look.
Boozy Twist — Add a splash of peppermint schnapps for a grown-up version.
FAQs
Can I make these without peppermint extract?
Yes, you can skip it for classic fudgy brownies or use vanilla only.
Can I use melted chocolate instead of cocoa powder?
Yes, substitute ½ cup melted dark chocolate and reduce butter slightly.
How do I keep brownies fudgy?
Don’t overbake — remove them when the center still looks slightly soft.
Can I make them in advance?
Yes, they actually taste even better the next day as the flavors meld.
What’s the best cocoa to use?
Unsweetened natural cocoa or Dutch-process both work; Dutch gives richer color.
How do I crush candy canes neatly?
Place them in a zip-top bag and gently crush with a rolling pin or meat mallet.
Can I double the recipe?
Yes, bake in a 9×13-inch pan and add 5–7 minutes to the baking time.
Can I use mint chocolate instead of extract?
Absolutely — melt it into the batter for a smooth mint flavor.
How do I get clean brownie slices?
Cool completely and use a sharp knife wiped clean between cuts.
Can I add nuts?
Yes, chopped walnuts or pecans add great crunch and flavor.
Conclusion
One bowl peppermint brownies are the perfect holiday treat — rich, chewy, and filled with festive flavor. The cool peppermint pairs beautifully with the deep chocolate, creating a dessert that feels indulgent yet refreshing. With minimal cleanup and maximum flavor, these brownies are a must-bake for the season. Whether for a cookie swap, dessert table, or cozy winter night, each fudgy bite delivers pure holiday magic — simple, elegant, and undeniably delicious.
Looking for more tasty recipes? Visit our website for full details and follow us on Pinterest for daily food ideas to save and share