Why You’ll Love This Recipe
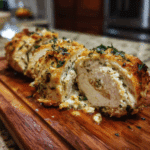
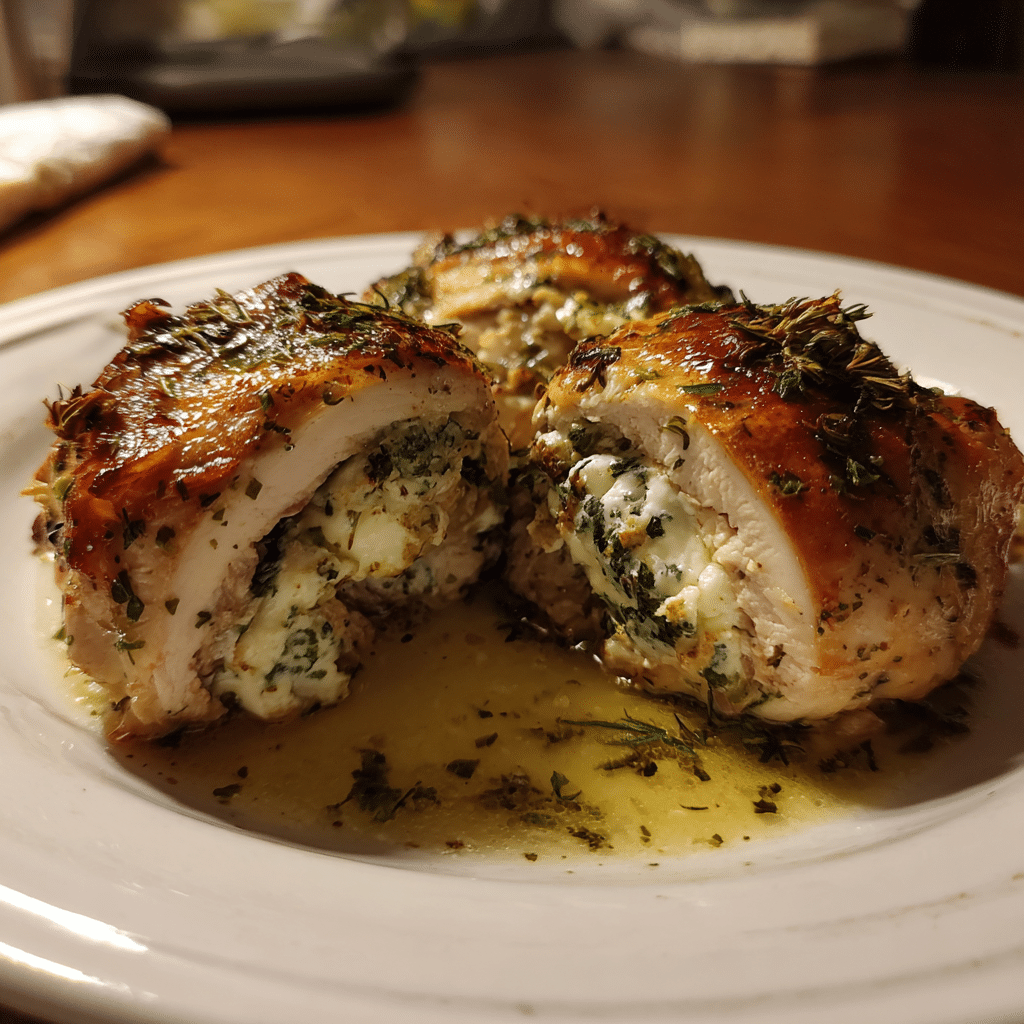
Herbed ricotta stuffed chicken rolls are a delicious blend of tender chicken, creamy ricotta, and fragrant herbs baked together into a dish that feels both comforting and sophisticated. Each roll is filled with a luxurious mixture of ricotta, garlic, and fresh herbs, then baked until juicy and golden. I made this for a family dinner once, and it instantly became a go-to recipe — the kind that looks impressive but is surprisingly simple to make. The creamy filling melts into the chicken as it cooks, creating a savory, aromatic bite in every slice. Whether you’re hosting guests or just want to elevate a weeknight meal, these chicken rolls bring restaurant-quality flavor right into your home kitchen.
Flavorful Herbed Ricotta Stuffed Chicken Rolls: Tender, Cheesy, and Perfect for Elegant Dinners
- Total Time: 45 minutes
- Yield: 4 servings
- Diet: Gluten Free
Description
Tender chicken breasts rolled with a creamy herbed ricotta filling, baked until juicy and golden.
Ingredients
- 4 boneless skinless chicken breasts
- 1 cup ricotta cheese
- 1/3 cup grated Parmesan cheese
- 2 tbsp fresh parsley, chopped
- 1 tbsp fresh basil, chopped
- 1 tsp garlic powder
- 1/2 tsp onion powder
- 1/2 tsp dried oregano
- 1/2 tsp salt
- 1/2 tsp black pepper
- 1 tbsp olive oil
- 1/2 cup breadcrumbs (optional, for topping)
Instructions
- Preheat the oven to 375°F (190°C). Lightly grease a baking dish.
- Butterfly each chicken breast and pound them thin for easier rolling.
- In a bowl, mix ricotta, Parmesan, parsley, basil, garlic powder, onion powder, oregano, salt, and pepper.
- Spoon the ricotta mixture onto each chicken breast and roll tightly. Secure with toothpicks if needed.
- Place the rolls seam-side down in the baking dish and brush with olive oil.
- Sprinkle breadcrumbs on top if using.
- Bake for 25–30 minutes or until the chicken is cooked through and lightly golden.
- Let rest for 5 minutes before slicing and serving.
Notes
- Use part-skim ricotta for a lighter version.
- Add spinach to the filling for extra nutrients.
- Top with marinara sauce for an Italian twist.
- Prep Time: 15 minutes
- Cook Time: 30 minutes
- Category: Dinner
- Method: Baking
- Cuisine: Italian
Ingredients
(Tip: You can find the complete list of ingredients and their measurements in the recipe card below.)
Chicken breasts — Thinly pounded for easy rolling and even cooking.
Ricotta cheese — Soft, creamy, and the perfect filling base.
Garlic — Adds aromatic depth to the ricotta mixture.
Fresh herbs (parsley, basil, or thyme) — Bring freshness, flavor, and vibrant color.
Parmesan cheese — Adds savory richness to the filling.
Salt and black pepper — Essential for seasoning both the filling and chicken.
Olive oil — Helps sear the chicken and adds flavor before baking.
Italian seasoning — Enhances the overall herb blend in the dish.
Lemon zest (optional) — Brightens the filling and adds subtle freshness.
Breadcrumbs (optional) — For a crispy coating if desired.
Directions
Preheat oven to 375°F (190°C). Lightly grease a baking dish.
Place each chicken breast between sheets of parchment and pound to an even thickness (about ¼ inch). Season both sides with salt, pepper, and Italian seasoning.
In a mixing bowl, combine ricotta, minced garlic, chopped herbs, Parmesan cheese, salt, pepper, and lemon zest if using. Stir until smooth and well blended.
Spread a generous layer of the ricotta mixture over each chicken breast. Starting from the shorter end, roll the chicken tightly and secure with toothpicks.
Heat olive oil in a skillet over medium-high heat. Sear each chicken roll for 1–2 minutes per side until lightly golden. Transfer the seared rolls to the prepared baking dish.
Bake for 20–25 minutes, or until the chicken is cooked through and the filling is hot and creamy. Remove toothpicks before serving. Allow the rolls to rest for 5 minutes before slicing.
Essential Equipment
Must-Have Tools to Get Rolling
Here’s what you’ll want to have on hand:
- Large pot – You’ll need this to boil the whole cabbage head and soften the leaves.
- large bowl –Spacious, durable large bowl ideal for mixing, serving, or food preparation. Made from sturdy material and easy to clean.
- Sharp knife – For coring the cabbage and slicing out the thick stem in each leaf. A paring knife works best.
- Mixing bowl – A big bowl makes it easier to combine your meat and rice filling evenly.
- Cutting board – For prepping cabbage leaves and rolling them like a pro.
- 9×13-inch baking dish – Ideal size to fit your rolled cabbage leaves snugly and prevent them from unraveling.
- knife – A sharp, durable kitchen knife perfect for slicing, chopping, and dicing with ease.
- Silicone Spatula – Durable, heat-resistant silicone spatula perfect for mixing, scraping, and spreading. Gentle on non-stick cookware and easy to clean.
Servings and timing
Serves 4. Preparation takes 15 minutes, cooking about 25 minutes. Total time: 40 minutes.
Storage/reheating
Store leftovers in an airtight container in the refrigerator for up to 3 days. Reheat gently in the oven at 325°F (160°C) for 10–12 minutes. Avoid microwaving too long, as the ricotta can become grainy. Leftovers are also great sliced and added to salads or pasta.
Variations and Customizations
Spinach Ricotta Rolls — Stir sautéed spinach into the ricotta filling for extra color and nutrients.
Tomato Basil Version — Add sun-dried tomatoes for rich, tangy flavor.
Prosciutto Wrapped — Wrap each roll in prosciutto before baking for a salty, crisp exterior.
Pesto Ricotta Rolls — Mix pesto into the ricotta for an herby, aromatic twist.
Crispy Crumb Coating — Roll the chicken in seasoned breadcrumbs before baking.
Creamy Alfredo Finish — Top with a drizzle of Alfredo sauce for added richness.
Garlic Lemon Rolls — Add extra lemon zest and juice for a brighter flavor profile.
Spicy Ricotta Rolls — Mix crushed red pepper flakes into the filling.
Mushroom Herb Filling — Add finely chopped sautéed mushrooms to the ricotta mixture.
Caprese Version — Stuff with ricotta, basil, and diced fresh mozzarella.
FAQs
Do I need to pound the chicken?
Yes, pounding ensures the chicken cooks evenly and makes rolling much easier.
Can I use cottage cheese instead of ricotta?
You can, but blend it first for a smoother texture.
Can I make this ahead of time?
Yes, assemble the rolls and refrigerate up to 12 hours before baking.
Do I have to sear the chicken before baking?
Searing adds color and flavor, but you can skip it if short on time.
Can I freeze stuffed chicken rolls?
Yes — freeze unbaked rolls and bake from frozen, adding 10–12 extra minutes.
What herbs work best in the filling?
Parsley, basil, thyme, or a mix of all three.
Can I add veggies to the filling?
Yes — spinach, mushrooms, or roasted red peppers work well.
What temperature should the chicken reach?
165°F (74°C) for safe doneness.
Can I use chicken thighs?
Yes, but they may be harder to roll; secure tightly with toothpicks.
What side dishes pair well?
Roasted vegetables, rice pilaf, mashed potatoes, or a simple Italian salad.
Conclusion
Flavorful herbed ricotta stuffed chicken rolls are a delicious way to elevate a classic chicken dinner. With their creamy filling, tender chicken, and aromatic herbs, they offer a perfect combination of comfort and elegance. Whether served at a special gathering or enjoyed on a relaxed weeknight, this recipe delivers impressive flavor with minimal effort. Once you try it, you’ll find yourself making these savory, cheesy rolls again and again.
Looking for more tasty recipes? Visit our website for full details and follow us on Pinterest for daily food ideas to save and share